
Now that there is a distribution of .NET Core on a Linux distro running on my Raspberry Pi 3, I had to try it.
In this post, I will explain all the steps I had to execute to be able to run my first Hello World application.
First, you will need to install on your Pi the Ubuntu MATE distribution. Currently, the RASPBIAN distribution, which is the mostly used, is not supported but it seems that it will be soon the case according to this Github issue on dotnet / core.
Download Ubuntu MATE 16.04.2 LTS for Raspberry Pi, then extract the image out of the archive.
To install it on your microSDHC, the best is to use Win32 Disk Imager which you can install using Chocolatey with the command ‘choco install win32diskimager’.
Then just write the image you extracted on your microSDHC using Win32 Disk Imager, like this:
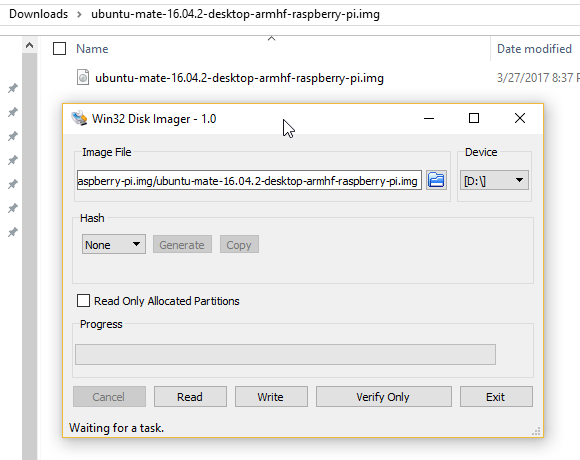
Wait a couple of minutes then plug the microSDHC in your Pi and boot it, then follow the installation instruction and create your user.
Currently, there is no .NET Core SDK running on ARM processor, the CPU architecture of the Pi. So you will have to write and compile your program from another machine, in my case I run on Windows.
Now to simplify all the operations I installed a SSH server on the Pi to make it easy to access it remotely and copy files from my Surface.
To install the SSH server, run a shell, and run the following commands
sudo apt-get update
sudo apt-get install openssh-server
sudo ufw allow 22
sudo /etc/init.d/ssh restart
Then we will need to install some .NET Core native prerequisites for Ubuntu as explained on the Github dotnet / core documentation.
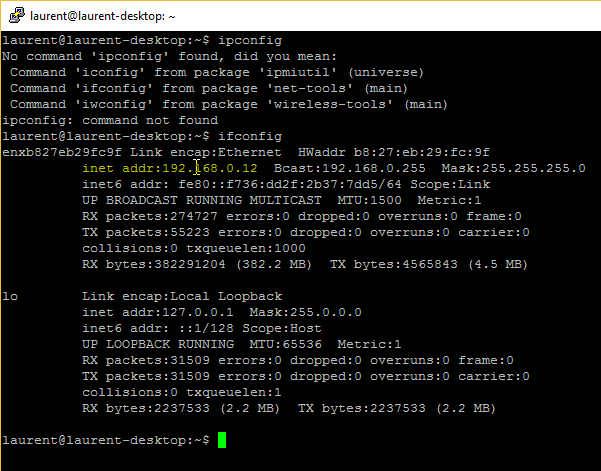
sudo apt-get install libunwind8 libunwind8-dev gettext libicu-dev liblttng-ust-dev libcurl4-openssl-dev libssl-dev uuid-dev unzipYou will need the IP of your Pi, so use the command ‘ifconfig’ which will output something like that
Then back to your PC, install Putty using ‘choco install putty’ and WinSCP using ‘choco install winscp’.
Configure both Putty and WinSCP to connect to your Pi using the IP address you’ve got from the ifconfig command
Now that we have the Pi running the right Linux distribution on it and we can connect to it easily from our computer, it is time to create a first .NET Core project. For sure, we will start with the famous Hello World.
Install .NET Core 2.0 SDK, I used the Windows x64 version 2.0.0-preview1-005685 which I downloaded as a zip. Unpack it on your hard drive in a folder named dotnet, then create another folder at the same level called hello and create a new console application:
mkdir hello
cd hello
..\dotnet\dotnet.exe new console
Edit the file hello.csproj created in the folder. I use Visual Studio Code for that, which again can be installed using Chocolatey ‘choco install visualstudiocode’. You will need to update the RuntimeFrameworkVersion with the version that you can find on the page .NET Core Runtime & Host Setup Repo / Daily Builds then find Ubuntu 16.04 (arm32) and get the version, in my case 2.0.0-preview1-005685.
<Project Sdk="Microsoft.NET.Sdk">

  <PropertyGroup>
    <OutputType>Exe</OutputType>
    <TargetFramework>netcoreapp2.0</TargetFramework>
    <RuntimeFrameworkVersion>2.0.0-preview1-001887-00</RuntimeFrameworkVersion>
    <RuntimeIdentifiers>win8-arm;ubuntu.14.04-arm;ubuntu.16.04-arm</RuntimeIdentifiers>
  </PropertyGroup>

</Project>
Then run, and publish
..\dotnet\dotnet.exe restore
..\dotnet\dotnet publish -r ubuntu.16.04-arm
Finally, you will get the publish results in the folder .\hello\bin\Debug\netcoreapp2.0\ubuntu.16.04-arm which you can easily upload to your Pi using WinSCP previously installed.
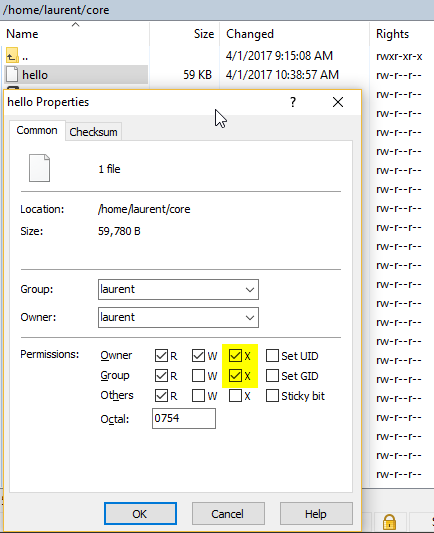
You need then to set the hello executable to have the execution rights on the Pi, which you can also do easily from WinSCP
The final step is to run you hello executable on the Pi, which you can do using Putty over SSH then, or by having your Pi connected to a monitor, mouse, and keyboard!
Here is the result
